Tuesday, January 22, 2013

Salad In A Jar

We have had so many requests for this recipe since we plastered it all over Facebook :)  These are easy but a little time consuming because you need to chop up all the veggies. Putting them together is a breeze. You can make the salad any way you want.... chicken taco, sea food, fruit, etc. or just put veggies/meat in the jar and enjoy! Let your imagination run wild.

The secret (if there is one) is to keep the hearty veggies at the bottom. There will be no sogginess if you remember this. Use things like shredded cabbage, celery & pea pods. Then add your peppers, fruit meat and lettuce always at the top.


This is the veggies and meat for 10 quart jars of salad.
I roasted several chicken breasts. A few with Lawry's season salt & fresh ground pepper. The others I seasoned with home made taco seasoning. I also used medium canned shrimp (rinsed well) and albacore tuna.

Decide on a dressing and pour it on the bottom of a quart canning jar. Next add some shredded cabbage, then for the taco chicken I put put chopped celery, cherry tomatoes sliced in half, sliced green onions, black beans, diced chicken breast and diced romaine lettuce. For this Chicken Taco Salad I made Restaurant Style Salsa. One had just salsa on the bottom, the other I mixed salsa and Greek yogurt together. 


Raspberry Chicken

Raspberry Chicken Salad
For the shrimp I made a dressing with equal parts of low-fat mayo and Greek yogurt,    1 tbs. Parmesan cheese and 1 tsp. horseradish along with salt to taste. I thinned it with almond milk. My friend Jason suggested taking Greek yogurt, zest of an orange and juice from the orange.  DEEELISH!!

I think you get now........ It's fun and delicious.
Add caption
  These make a really large salad, so feel free to share. I am going to try some in a pint jar next.
Bon Appetit
Let me know how yours turn out.


Friday, January 18, 2013

This Was A Surprise

I was looking around Pintrest the other day and I found this recipe on the the Amateur Gourmet for Roasted Cauliflower. After reading it I saw a link that someone left in the comment section. Now I get to an other cauliflower recipe that is made with "Anchovies" ewww!
Cauliflower is one of the staples in our house, it's right up there with beans  :)  I was excited about this recipe because I could use my mortar and pestel, which I haven't used in years! The wheels in my brain started worked, "how can I change this?" I changed up a few ingredients (left out the anchovies) and gave it shot.
It was very good!
Give it a try and let me know how you like it.

Roasted Cauliflower with Lemon Almond Sauce


mix sliced cauliflower with olive oil and salt & pepper
For the cauliflower
1 medium-sized head of cauliflower                              
3-4 T extra virgin olive oil
sea salt
freshly ground pepper
1 T parsley, chopped


For the lemon almond sauce
1 clove of garlic
1 t lemon juice, freshly squeezed
1 palm full of almonds
3 T extra virgin olive oil (add until mixture until a thick sauce)

Preheat oven to 350˚F (175˚C). Remove any green leaves from cauliflower. Place head of cauliflower stem side down on a cutting board and slice like a loaf of bread into ¾-inch thick slices through the stem and all. (It will not all stay together) 

Toss cauliflower slices in a bowl with the oil and generous amounts of salt and a few grindings of pepper. 

Lay out in one layer on a parchment-lined baking sheet. Place pan in oven and bake for 1 hour, turning the pieces 3-4 times. The cauliflower should turn deep golden brown, extremely tender and fall apart easily. It may appear ready after 40 minutes, but you want to press on and wait until the cauliflower completely collapses. Some smaller bits will turn dark brown and crispy. Do not discard them. They are the best parts.


Prepare the lemon almond sauce. Pulverize the piece of garlic in a mortar with a pestle. Pour lemon juice over it and let sit for 10 minutes to remove the rawness.

Coarsely chop the almonds and then add them to the mortar and pound to a paste.
Note: that's the new knife my kids bought me for Christmas.... If you have nothing else in your kitchen, have a GOOD knife.
Drizzle the olive oil while stirring with the pestle until a thick, pourable sauce is formed.

 
Place the roasted cauliflower in a bowel, add lemon almond  sauce, mix well and top with sliced green onion ends and serve, either warm or at room temperature.
 I also added a few red pepper flakes at and blended them in.


We had the lemon almond cauliflower with Chicken with Balsamic Vinegar and I added green and red bell peppers.

This was a success and I had fun making it. I hope you enjoy it and it would be a good recipe to try on the people who say they don't like cauliflower. The nutty taste with the little lemon flavor pretty much changes the tastes into something delightful.

Leave me a comment, I'd love to hear from you.

Find your ~bliss

Pam


Tuesday, January 15, 2013

Moving Right Along

Things are going great. It's 2013 and we are healthier then we have been in the 12 years we have been together.

Bruce has lost a whopping 155 lbs.


July 2011

Febuary 2012 When the journey began
August 2012 The first 80lbs.
January 2013... 155lbs.


I couldn't be prouder of him. He has worked so hard and he just keeps going. There is a light at the end of the tunnel now. He is on his last 50lbs.

We are leaving for Miami on January 29th so we are doing the TLS Find Your Fit Fat Shredder. We can lose up to 14lbs. in 2 weeks. Very excited about this. I actually am working out. The TLS Find Your Fit Fat Shredder has a 10 min. power workout. Today was my first day and it took me about 20 minutes, but I did it! Anybody who knows me gets it :) I hate to sweat! But I also don't like being out of shape, so that wins. If you are interested in the Fat Shredder, just drop me an email and I will get you the info.

Well I needed to make something for lunch and it was midnight......... I got out a 1lb package of ground turkey and browned and drained it. Looked in the pantry and got a can of black beans (here we go with the bean again :) and a can of tomatoes with green chilies. Now I'm thinking Taco salad.
I rinsed the beans and added them to the browned ground turkey along with the can of tomatoes.

 I also added a palm full of Wildtree Cajun Seasoning, mixed it all together and let it simmer until all the liquid was gone and the flavors were blended.  I found a cube of basil in the freezer and I added that also. I guess I need to get some more cilantro.
I always have a tupperware dish full of salad made in the frig. When the "taco" mix was done, I just put a couple of handfuls of salad in a dish, topped it with the "taco" mix and some low fat shredded Italian blend cheese. All Bruce has to do for lunch is add some Annie's Naturals Organic Cowgirl Ranch Dressing.

With lunch done.... on with breakfast.  Checked the frig again and found 8 eggs, turkey pepperoni and still had some of that cheese left from the "tacos".
Individual Omelets coming up!

Scramble 8 eggs with 1/2 cup water, 1 tsp sea salt and 1 tsp fresh ground pepper.

If you don't have a stick mixer.....I highly recommend one! They are one of the best things I bought. I got it as a gift for someone, couldn't remember who, so I kept it.... Everything happens for a reason :)
They work really well for smoothies also!

Next grease a cupcake tin and poured in about 1/3 cup of the scrambled eggs. Place 2 slices of Hormel Turkey Pepperoni in each and sprinkled with the shredded low fat Italian cheese.

Bake in a 350 degree oven for 10-15 minutes or until a toothpick comes out clean.
And you end up with these cute little omelets!
And a happy healthy meal.
ENJOY!          


Thursday, January 10, 2013

Happy New Year!

It's a new year and we all have New Years Resolutions on our mind.


If getting healthy, eating healthy and maybe taking up less space is on your Resolutions list....Have I got a deal for you. 

If you fit any of the above you may be able to win up to $50,000.00 just for keeping your New Years Resolution.

Let me know if you are in.......


Spicy Roasted Red Pepper Hummus with Whole Wheat Basil Pita Toasts

Ingredients:

FOR THE HUMMUS 
                                                                   
2 medium Red Bell Peppers
1 small Serrano Chile Pepper
1 {15oz.} can Garbanzo Beans
Simply Scratch
2 cloves of Garlic, roughly chopped
1/3 cup Tahini
1/3 cup Fresh Lemon Juice {about 1 lemon}
1 teaspoon Kosher Salt

FOR THE PITAS

5 Whole Wheat Pocket-less Pitas
1/4 cup Olive Oil
1/2 teaspoon Garlic Powder
1/4 teaspoon Dried Basil
1/4 teaspoon Black Pepper

Directions:

FOR THE HUMMUS

Preheat your oven to 425 degrees. On a foil lined sheet pan place washed peppers and roast until charred and the skin is blistered. The Serrano chile should only take about 10 minutes and the bell peppers about 30. Rotate the peppers ever 5 minutes to evenly char. Remove the peppers and place in a paper bag or a bowl covered with plastic wrap {or a plastic bag will work too} and let the steam work on the skin making it easy to peel. Let the pepper sit for 20-30 minutes or until cool enough to peel. Remove the seeds of the peppers and chile and roughly chop. *for a less spicy hummus use half of the chile.
In the bowl of a large food processor; add the garbanzo beans, garlic, tahini and lemon juice. Turn on the processor until the ingredients are combined and it resembles a thick paste. Add in the peppers, Serrano chile and the teaspoon of kosher salt. Blend until smooth.
Cover and refrigerate until ready to use.

FOR THE PITAS:

Preheat oven to 400 degrees.
Combine the oil with the garlic powder, basil and black pepper. Stir and brush both sides of the pitas generously. Cut each pita bread into 8 wedges. Working in batches, bake the pita wedges for 5-6 minutes, flip and bake for an additional 5-6 minutes or until lightly browned and crispy. Serve warm.
  
Pineapple Chicken Teriyaki Recipe

Servings: 4 Prep Time:10 minutes Cook Time:20 minutes
chicken-teriyaki-featured-9965
From Catherine McCord's Weelicious Cookbook.

Ingredients:

1 (8-ounce) can crushed pineapple 
3 tablespoons low-sodium soy sauce
2 tablespoon honey or agave nectar
1 teaspoon grated fresh ginger 
1 small garlic clove, finely minced
4 boneless, skinless chicken breasts (about 2 pounds)

Directions:

1. To make the teriyaki sauce, place the crushed pineapple, soy sauce, honey, ginger and garlic a bowl, whisk to combine. Pour half of the teriyaki sauce in a resealable plastic bag and reserve the other half. Place the chicken breasts in the resealable bag, close and give it a good massage to coat with the marinade. Refrigerate for 30 minutes or up to overnight.
3. When ready to cook, turn on the broiler and place the rack in the middle position. Place the marinated chicken breasts on a foil-lined baking sheet and spoon some of the chunky pineapple/ginger from the marinade on top of the breast. It will help keep the chicken moist. Broil for 8 to 10 minutes on each side, for a total of 16-20 minutes. Discard any remaining marinade in the bag.
4. While the chicken is broiling, heat the reserved teriyaki sauce (that you had previously set aside in step 1) in a saucepan. Bring to a simmer and cook for 3 minutes or until thickened slightly.
5. When chicken is done, Slice the chicken, pour the teriyaki sauce over top and serve immediately.
TIP: Keeping the chicken in the marinade overnight will make it even tastier.
TIP: Instead of broiling, the chicken can also be grilled for 6 minutes on each side.

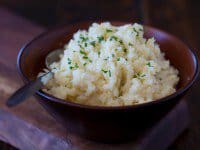
Cauliflower Mashed "Potatoes" Recipe

This is one of our favorites!

mashed-cauliflowr-recipe-7223.jpg
SteamyKitchen.com
Servings: 4 Prep Time:8 minutes Cook Time:20 minutes

Ingredients:

1 head of cauliflower
3 tablespoons milk 
1 tablespoon butter
2 tablespoons light sour cream
1/4 teaspoon garlic salt
freshly ground black pepper
snipped chives

Directions:

1. Separate the cauliflower into florets and chop the core finely.
2. Bring about 1 cup of water to a simmer in a pot, then add the cauliflower. Cover and turn the heat to medium. Cook the cauliflower for 12-15 minutes or until very tender.
3. Drain and discard all of the water (the drier the cauliflower is, the better) and add the milk, butter, sour cream, salt and pepper and mash with a masher until it looks like "mashed potatoes." Top with chives.


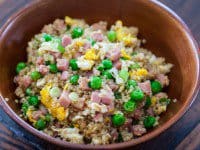
Quinoa Fried Rice Recipe

This recipes can be made meatless also. You can add any veggies to this you want. Imagination run wild :)

 Servings: 4 Prep Time:10 minutes Cook Time:10 minutes

qunioa-fried-rice-ham-egg-recipe-feature-9395
For best results, use leftover quinoa that's been chilled in the refrigerator. If you don't have time, cook the quinoa but using only 80% of the water that the recipe calls for on the package. Once the quinoa is cooked, spread it out on a baking tray or large bowl and place in freezer for 10 minutes. This will chill the quinoa for the recipe.
Fish sauce is the secret ingredient to this dish - if you cannot find it, substitute with additional soy sauce).

Ingredients:

1 tablespoon grapeseed oil 
2 eggs 
1 cup diced turkey ham
1 stalk green onion, chopped 
1 clove garlic, finely minced
1 teaspoon grated fresh ginger 
1/2 cup frozen peas 
2 cups cooked, chilled quinoa (about 1/2 cup raw) 
1 1/2 teaspoon low sodium soy sauce 
1 teaspoon fish sauce
freshly ground black pepper

Directions:

1. Heat a wok or large saute pan over high heat. When hot, swirl in the oil. Add in the eggs and scramble for 15 seconds. Once the eggs have just set, remove the eggs to a clean plate or bowl.
2. Return wok to stove and turn to medium-high heat. Add in the diced ham and cook for 2 minutes until warmed through and browned. Push the ham to one side of the wok to leave room to fry the next ingredients. Add a bit of  oil if necessary. Add in the green onion, ginger and garlic, stir fry for 30 seconds until fragrant. Mix in with the ham.
3. Add in the cooked eggs, frozen peas and quinoa. Toss and stir fry for 2 minutes, spreading everything out over the surface of the wok. Pour in the soy sauce, fish sauce and add in the black pepper. Toss again and stir fry for an additional minute. Taste and add in additional soy sauce or fish sauce if needed (remember that the ham is salty so make sure you grab a bite that includes ham.)


Zucchini Frittata Recipe

Servings: 4 Prep Time:10 minutes Cook Time:25 minutes
zucchini-frittata-recipe-7837.jpg
 Adding just a pinch of tuvia  to the onions will speed up the caramelization. After the frittata is cooked, let it cool before cutting into it -- it's easier to cut nice, clean slices when the frittata has had a chance to cool.

Ingredients:

1 onion, sliced
3 tablespoons butter
1/8 teaspoon sugar 
12 ounces zucchini (1 large zucchini or 3 small zucchini)
salt and freshly ground black pepper
5 eggs 
sprig of fresh thyme (or 1/4 teaspoon dried thyme) 
1 tomato
4 ounces goat cheese

Directions:

1. Heat a nonstick pan over medium heat and add the butter. When the butter starts bubbling, add the onion. Sprinkle in the sugar. Saute the onion until caramelized, about 8-10 minutes. Take care not to burn the onions.
2. While the onion is sauteing, slice the zucchini very thinly (1/8" thick) using sharp chef's knife or a mandolin. Cut the tomato into 1/4" slices. When the onion is ready, add the zucchini and season with salt and pepper. Cook, stirring occasionally until zucchini is tender and has just started to brown.
3. In a large bowl, beat the eggs with the thyme; Preheat the broiler and set the rack to about 8-10 inches below the heating element.
4. Once the zucchini is cooked, pour in the eggs. Top with sliced tomatoes and dot with crumbles of goat cheese. Cook for 6 minutes.
5. Place pan under broiler for 2-3 minutes until the top is lightly browned. Let cool for 10 minutes before slicing. Serve warm or at room temperature.